IRISPay PrestaShop Module Documentation
In this documentation you will read how to install and use our module ‘IrisPay’ developed for PrestaShop.
Documentation Content
- Installation
- Configuration
- Using the order options
- Cron Job for pending orders
- Email Files you might want to change
- Module Translation
- Contribute
Installation
- Upload it via modules- >add a new module->choose a file (v.X.X.X-irispay.zip)->upload this module via PrestaShop Module Manager or unzip and upload irispay folder to your root/modules folder via FTP
- Search the module under Modules type irispay
- Click install and then configure it
Configuration
Here you will find 2 sections, each section configures different things for the module.
To configure the module, you will have to navigate your self from the administrative(back office) menu Modules -> Module Manager and search for our module by typing ‘irispay’ with out the single quotes and pressing enter, then click on the configure button.
Configuration Section I: Connection Settings
All the credentials are give from ΔΙΑΣ.
Company code, username and password all are give from ΔΙΑΣ account.
Validity period default value is 18 and it is measured in minutes.
It is goode to keep it above 18 minutes, a small number may result in a non workable module as the ΔΙΑΣ web services will not accept it.
Activate Payment is a simple to have the module active or not.
Finally environment is for you to choose. Sandbox is for tests and not actual orders and are being recorded to the sandbox of ΔΙΑΣ. Live is for the live production environment.
Configuration Section II: Display and payment settings
Create order befor or after payment. This option may be the most crucial option on how you want the module to operate.
By choosing BEFORE, the customer when he/she clicks on the IRIS payment method an order will be redirected with PENDING status before he/she is been redirected to ΔΙΑΣ payment page. (the cart of the module will become an order thus the customer can not change the cart if he/she goes back).
If you choose AFTER the order will be created after the customer completes the payment and is redirected to your PrestaShop.
Send email option send an email with the payment link to your customer. This option functions only when the order is created before the redirect (previus option)
Payment image is for you to change the payment image that is showing to the customer at the checkout.
Show and hide is an option for you to decide if you want to show the image or not.
Using the order options
After an order is created with the irispay module, extra options and information will be show in the order page
The following screenshots indicate those options and data.
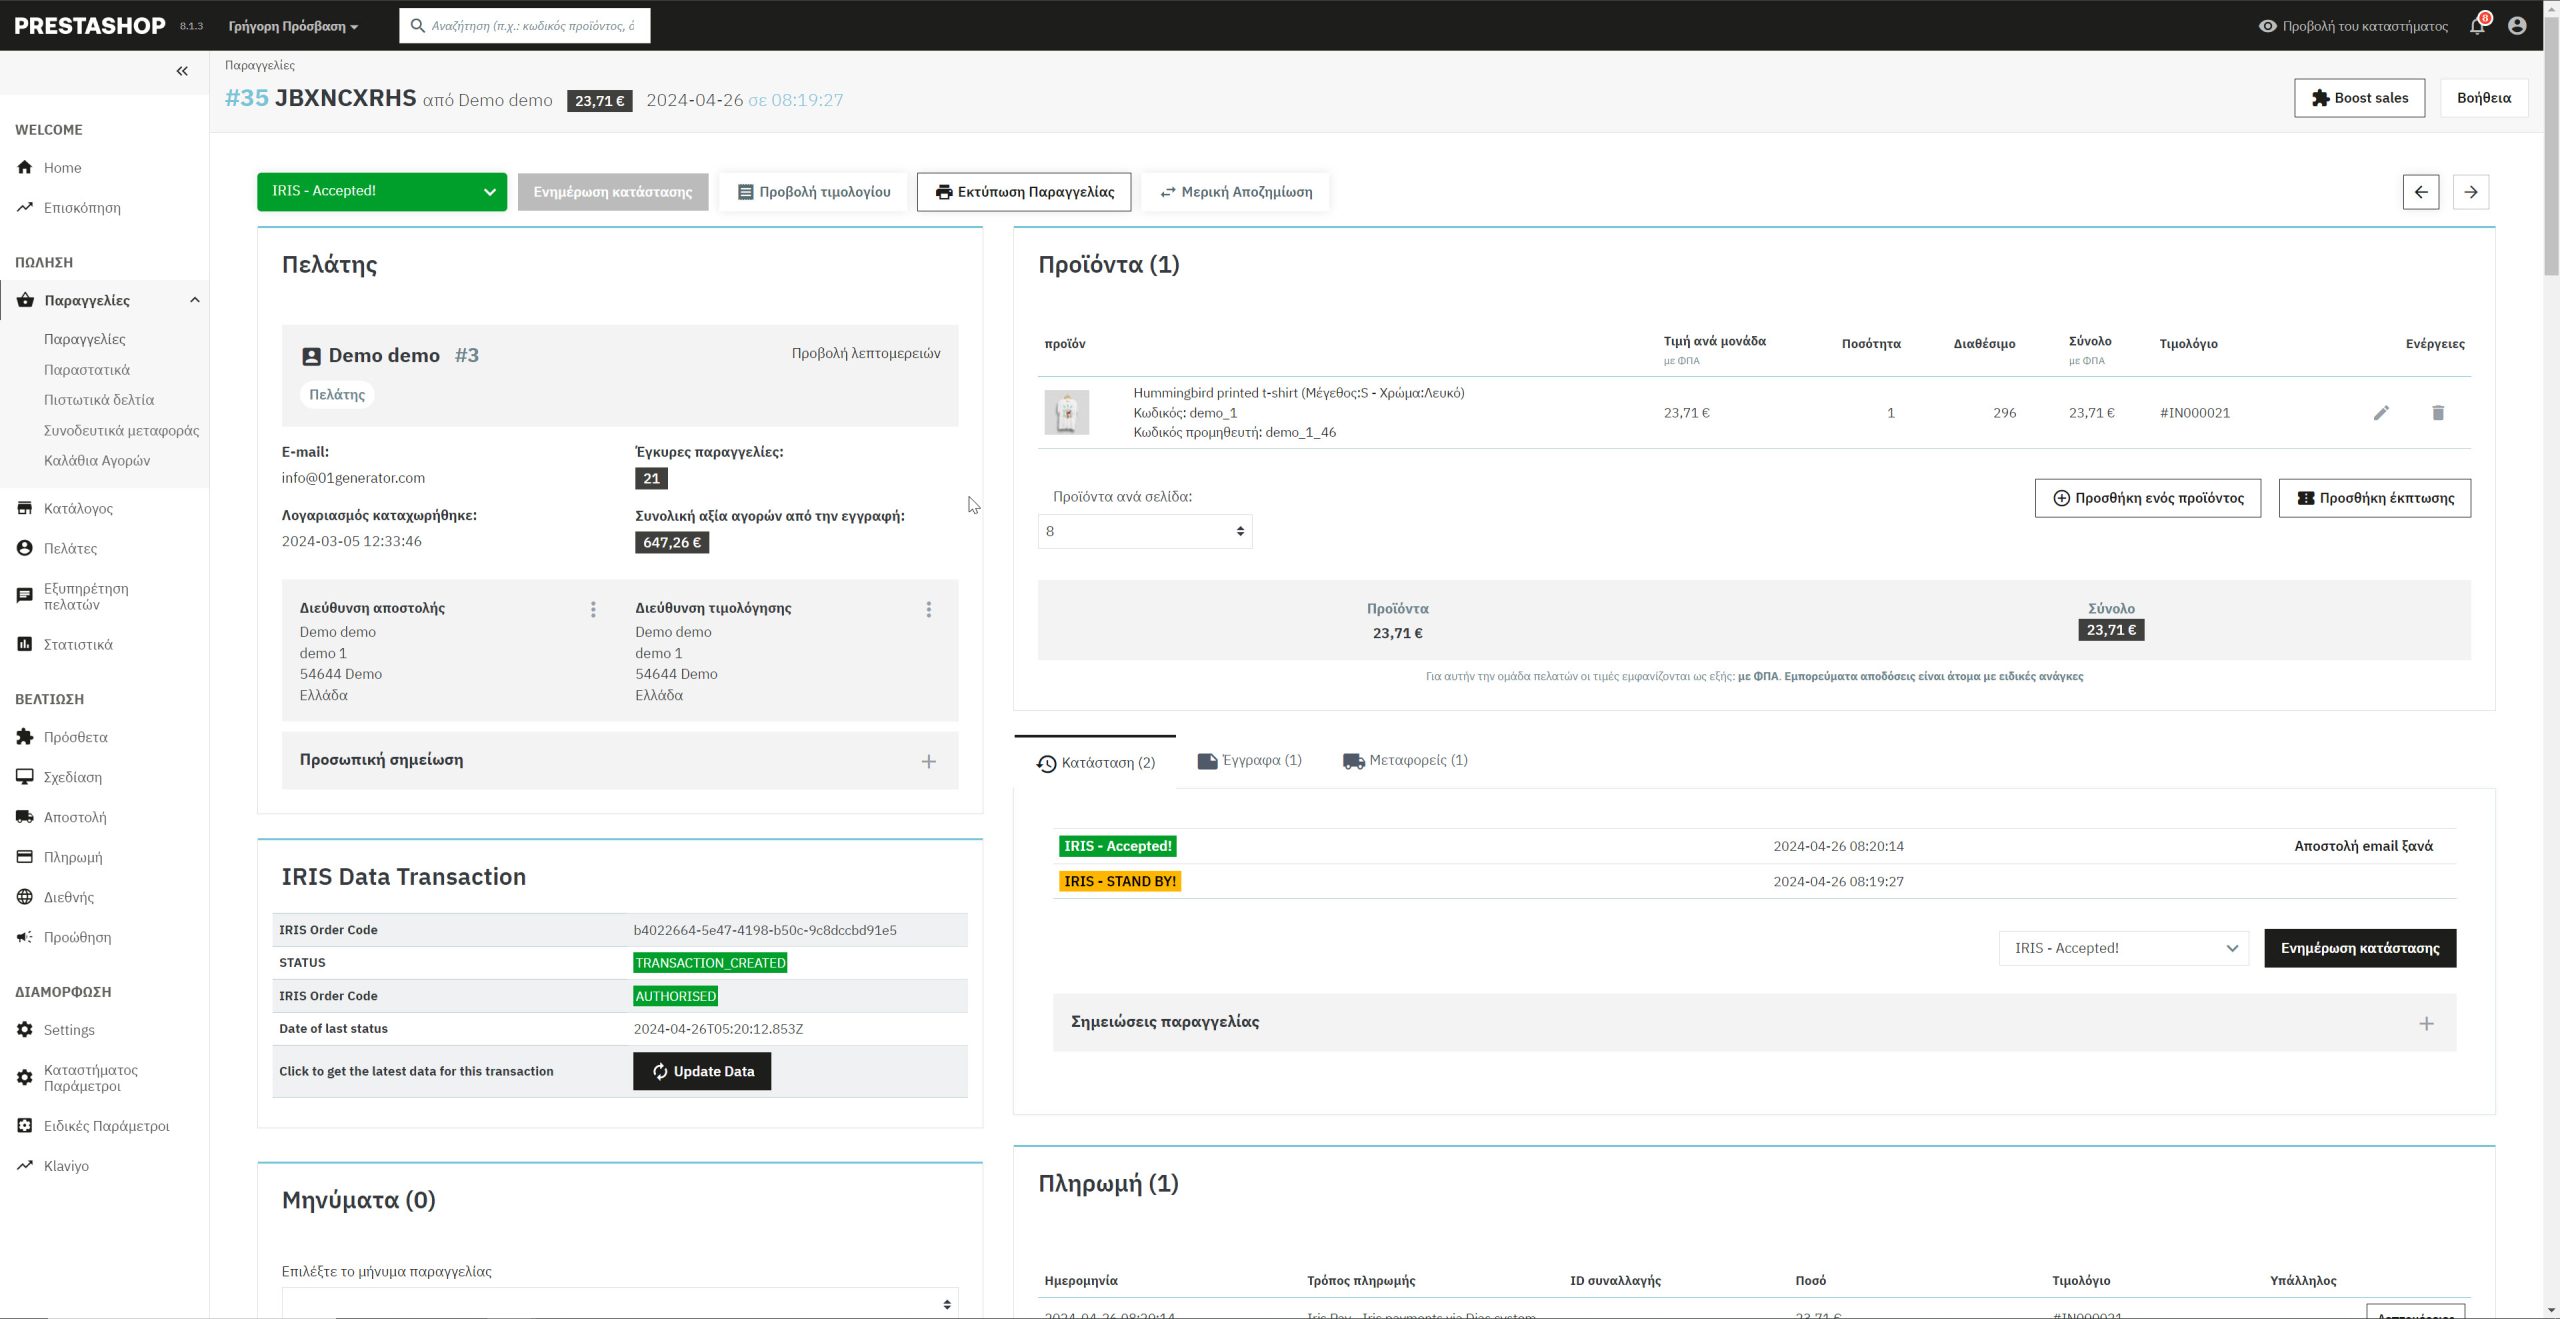
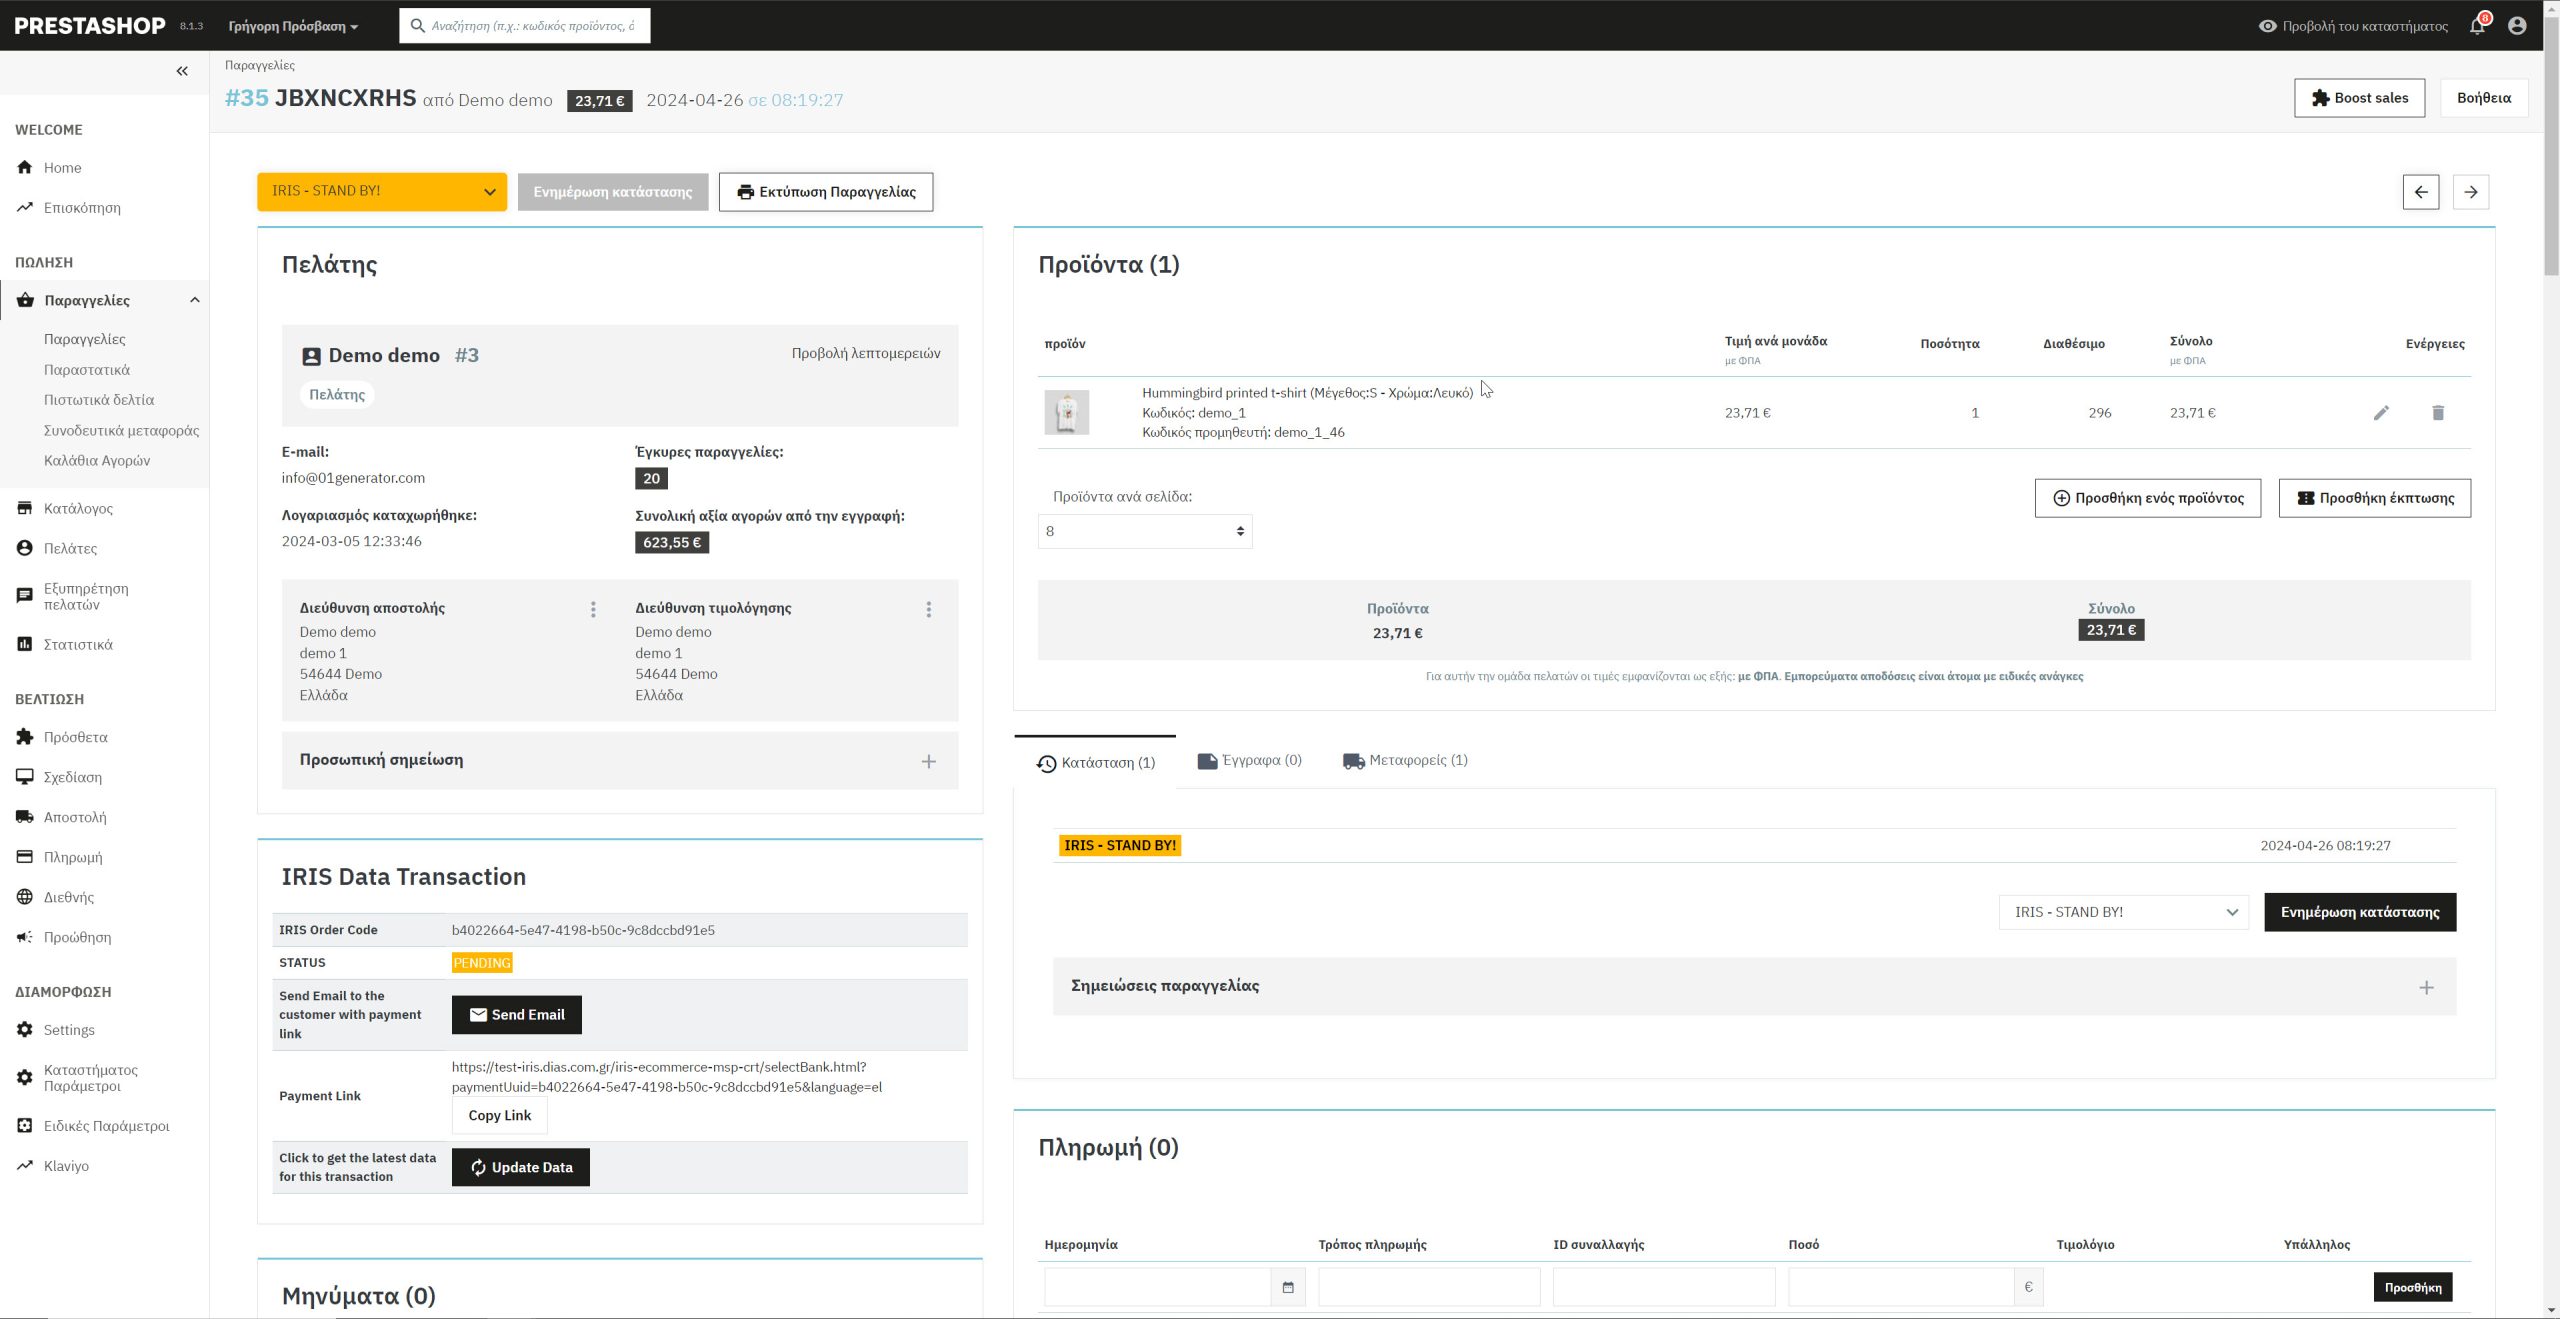
The table indicated usefull information for the IRIS transaction. If the payment is on PENDING status you have the option to send the payment link to your customer via email or simply copy the link and share it manually.
Finally the most usefull action is the update data, when you click it the module calls ΔΙΑΣ web service to get the latest status of the transaction updates the data table and order state accordingly and refreshes the page.
Cron Job for pending orders
From the configuration page of the module you will find a section that is giving instrunctions for you to create a cron job.
The method only searched for pending orders to get the latest status and change the status data and the order state accordingly.
Email Files you might want to change
There is a email template file that you might want to change to your standards.
- root folder/modules/irispay/mails/{language}/irispayment_notification.html
Variables to use in this email
{payment_link} for the payment link
{firstname} and {lastname} of the customer
{order_code} for the order code of the payment(you propably do not need it but we entered it)
Module Translation
To translate our module is easy. Navigate yourself from the back office (admin area) menu International -> Translations on the Modify Translations section choose.
Type of translation -> Installed modules translations
Select your module -> Irispay
Select your language -> The language you wish to translate it to.
And click modify.
Now translate each field and click save or save and stay button.
Contribute
Please feel free to contribute to our module and help PrestaShops all around the globe. You can contribute to our module by translating it and sending us the translated file of your native language via a support ticket! Translated files are stored at root folder/modules/irispay/translations/ folder. And if you are too kind you can also contribute by translating this documentation in your language!
Finally contribute by letting us know the flaws of our module, or the suggestions you have so we can make it better!
Please feel free to open a ticket for a difficulty you have or for a contribution in addons.prestashop.com (do not forget to login with the account you purchase the module first)
Happy sales! <3