VivaPay PrestaShop Module Documentation

In this documentation you will read how to install and use our module ‘VivaPay’ developed for PrestaShop.
Documentation Content
- Installation
- Configuration
- Using the order options
- Email Files you might want to change
- Module Translation
- Contribute
Installation
- Upload it via modules- >add a new module->choose a file (v.X.X.X-vivapay.zip)->upload this module via PrestaShop Module Manager or unzip and upload vivapay folder to your root/modules folder via FTP
- Search the module under Modules type vivapay or VivaPay Module integrades with VivaPayments API for varius payment methods.
- Click install and then configure it
Keep in mind!
Acceptable color values are hex code. You can search the internet for hex code to aid you or click on the ![]() to aid you choose a color.
to aid you choose a color.
Configuration
Here you will find 3 sections, each section configures different things for the module.
To configure the module, you will have to navigate your self from the administrative(back office) menu Modules -> Module Manager and search for our module by typing ‘VivaPay’ with out the single quotes and pressing enter, then click on the configure button.
Configuration Section I: Connection Settings
The first option is simple and activates the payment method or disables, in other words shows or not the payment methods of vivapay in the payment methods for the customer to choose.
Second option is the environment. Demo is for the demo environment(sandbox) that vivapayment has and is used for testing purposes, you can find the demo environment here and test cards for your test here.
As for the live environment. Here is the live one
For the rest fields in this sections to fill you will all find them and copy them from your vivapayments account, either the demo or the live one.
Screenshots below will indicate where to find each one.
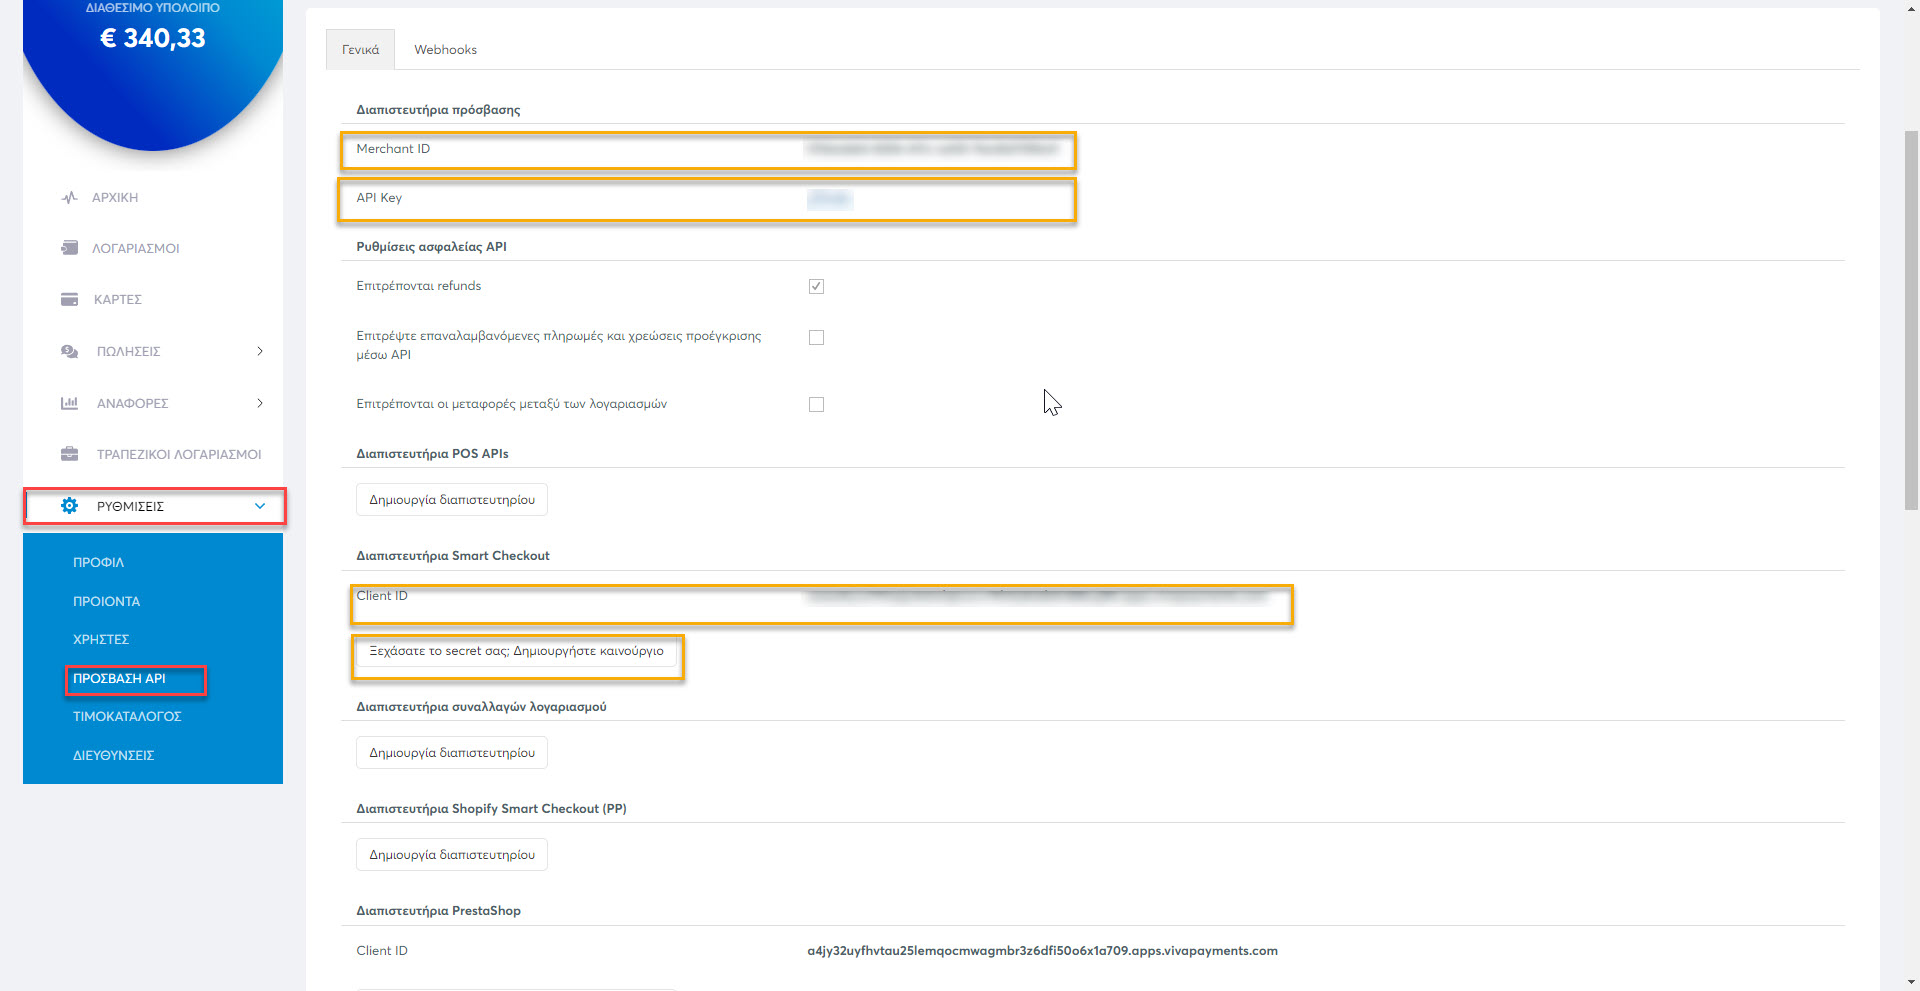
The first four fields you will find them in the first screenshot above, you will have to navigate to settings -> API access and you will find all 4 of them in the generl tab.
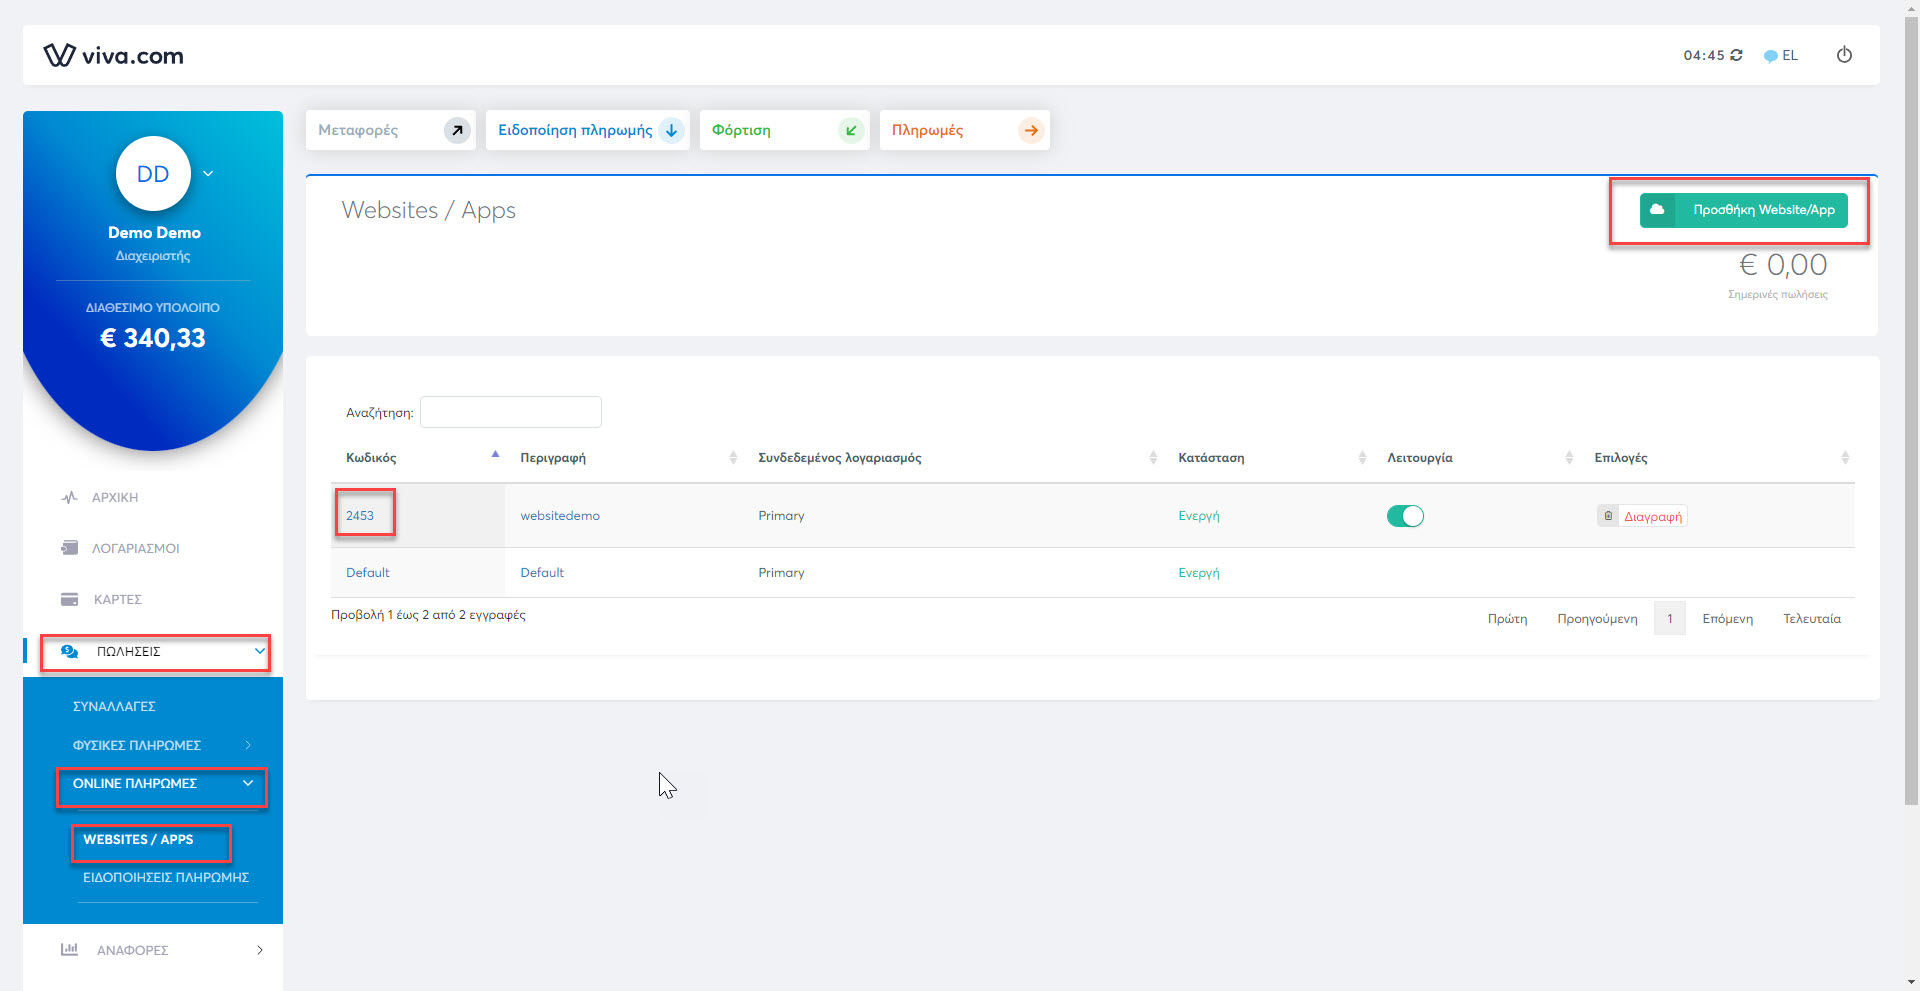
The source code is a little bit more tricky. You have to navigate to SALES, Online Payments and Websites/Apps from there you will have to create one by clicking on the add button on the right top corner.
You can also use the default one but you have to edit that one too.
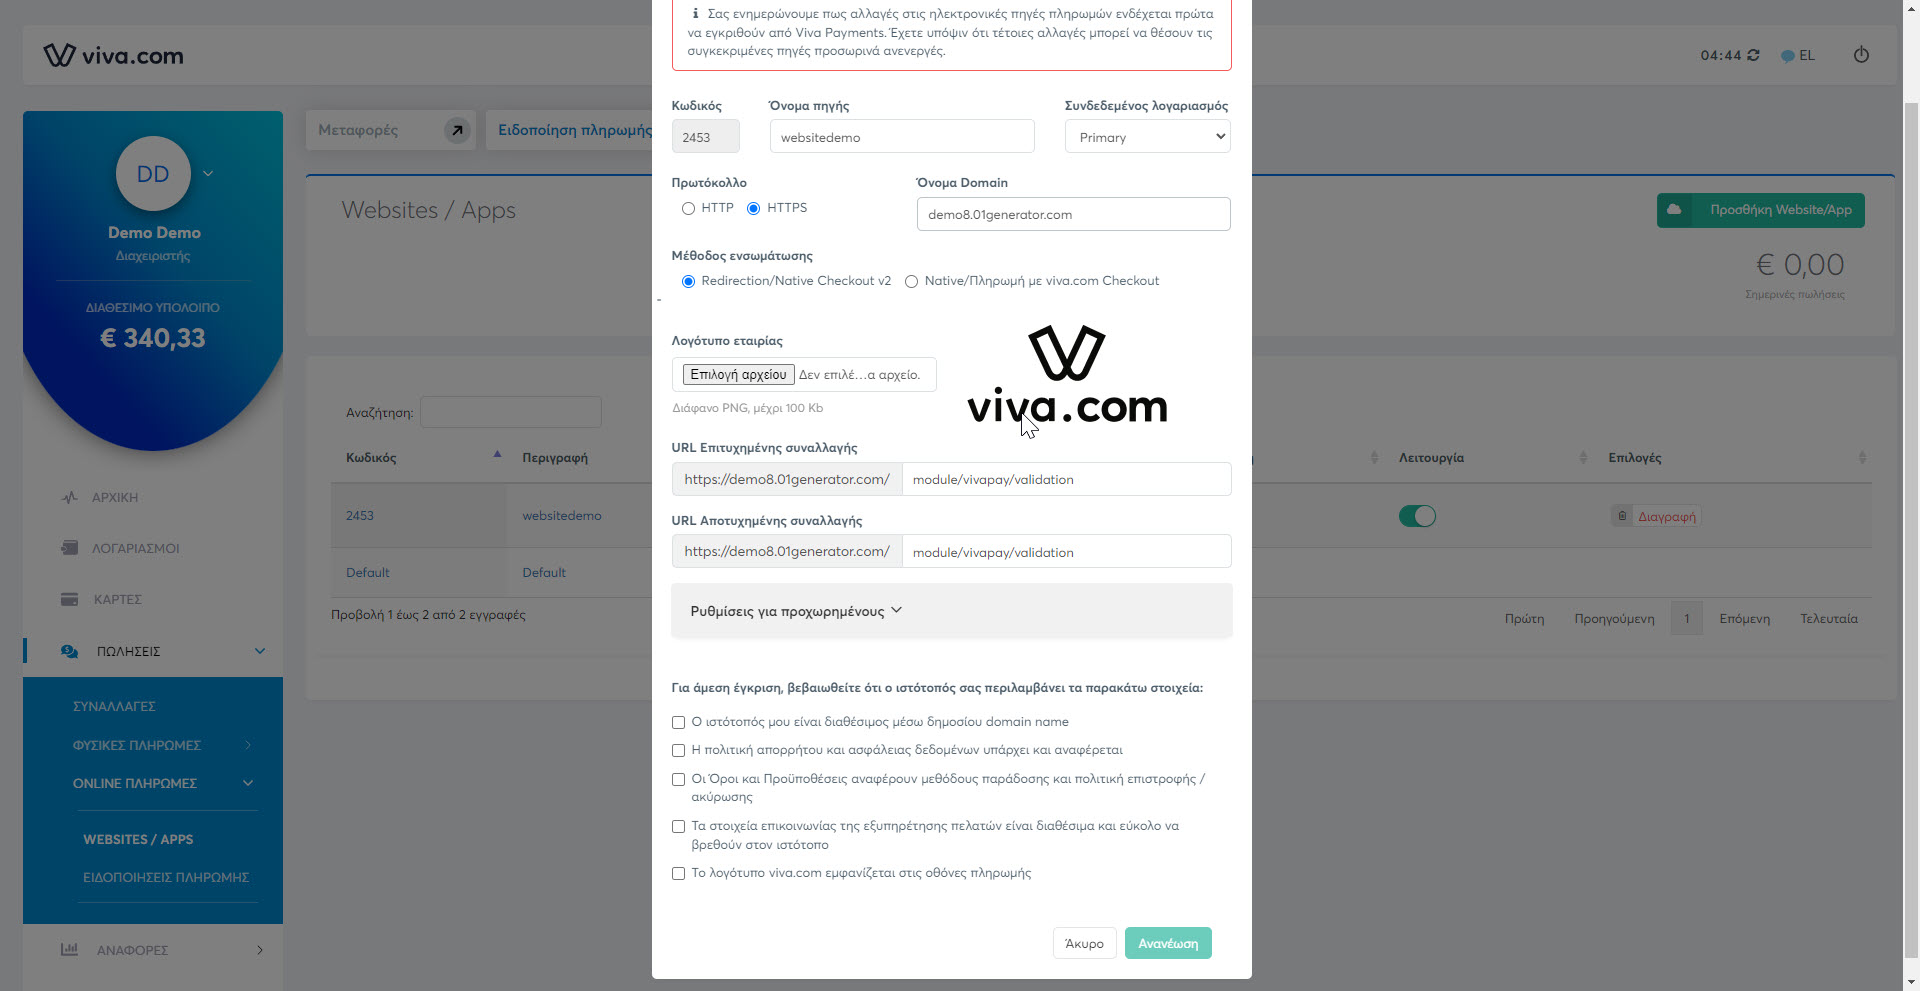
A new form will be shown to you and you have to fill everything as instructed.
Code is the code you will copy and paste to source code that the module is asking.
Source Name is a name for you to understand from which source came the transaction. You can enter whatever you like.
You choose https and you enter your domain for e.g. 01generator.com or www.01generator.com
Method you choose Redirection/Native Checkout v2
On the logo you can upload your buisness logo to be shown on the payment page of vivapayments.
Now the next two fields are crutial to enter them correctly.
In bothe fields you will enter
module/vivapay/validation
Then you check all the checkboxes and click create or update button.
Do not forget to copy the code!
Configuration Section II: Display and payment settings
The forst option here, is either to choose to create the order before or after the customer has choosen to pay with vivapayments method.
If you choose before, when the customer choose vivapayment method and click the button to complete the order, the customer will be redirected to the payment page of vivapayments but the order will be added to your prestashop as unpaid order. This option is good if you choose to offer payments that require a long time from the customer to complete such as IRIS or pay in a viva spot. The fallback to choose before is that if the user changes his/her mind and go back to add or remove an item from the cart can not do it as the order is created.
Now if you choose after, the order will be created after the customer completes the payment on the payment page of the vivapayment. So if the customer chooses to go back before he completes the payment to change something in the cart he or she can do that as the cart exists.
The second option is to choose to send an email to the customer the payment link of the order. This option takes place only if the option to create the order before redirection is choosen.
The customer will get the payment link via email and can pay the order by clicking on the link of the email even if he had alreasy close the page that he/she been redirected to at the first place.
Preauth has to do with your option if you want to charge the card of your customer directly or keep the amount in his account but he/she can not use it. If you have it off it is a direct charge if you have it on you freeze the amount to your customers account. Basically this option is good if you have it on for instant refunds but do not forget! You have to accept the transactions if you have it on to actually charge the card of the customer, this is done via the Sales -> transactions and clicking on the charge button of each transaction.
This is a payment option to give to your customer to pay in a viva spot and e-banking ΔΙΑΣ
VivaWallet option gives your customer the option to pay via viva wallet account
Payment timeout is the time that the payment link will be available, this is in seconds, default value is 1800 – 30 minutes.
Enter 65535 value to never expires.
If you have payment methods that require time, it is advised to at least give 1800seconds to your customer.
If you create orders from your backoffice and choose to send the payment link to your customer is also adviced to have it at least 7200 – 2 hours
On this section you choose the payment image you want to display next to vivapay payment method on your checkout.
On the show/hide you choose either to show or hide that image
Finally here you enter a hex code color in order to choose to be the dominant color on the vivapayments page.
Configuration Section III: Installment Settings
Instalments settings are quite staitforward.
You create scenarios for isntallments. For eg if I want to offer up to 3 installments for orders above 100€ and below 500€ and 6 installments for all orders that are above 500€
Then I will create 2 scenarios
One scenario with minimum ammount 100, maximum amount 500 and number of installments 3
Second scenario with minimum ammount 400, maximum amount 0(I enter 0 to make it infinant) and number of installments 6
the saved scenarios will be shown bellow and you can delete one by clicking the delete button.
Using the order options
After an order is created with the vivapay module, extra options and information will be show in the order page
The following screenshots indicate those options and data.
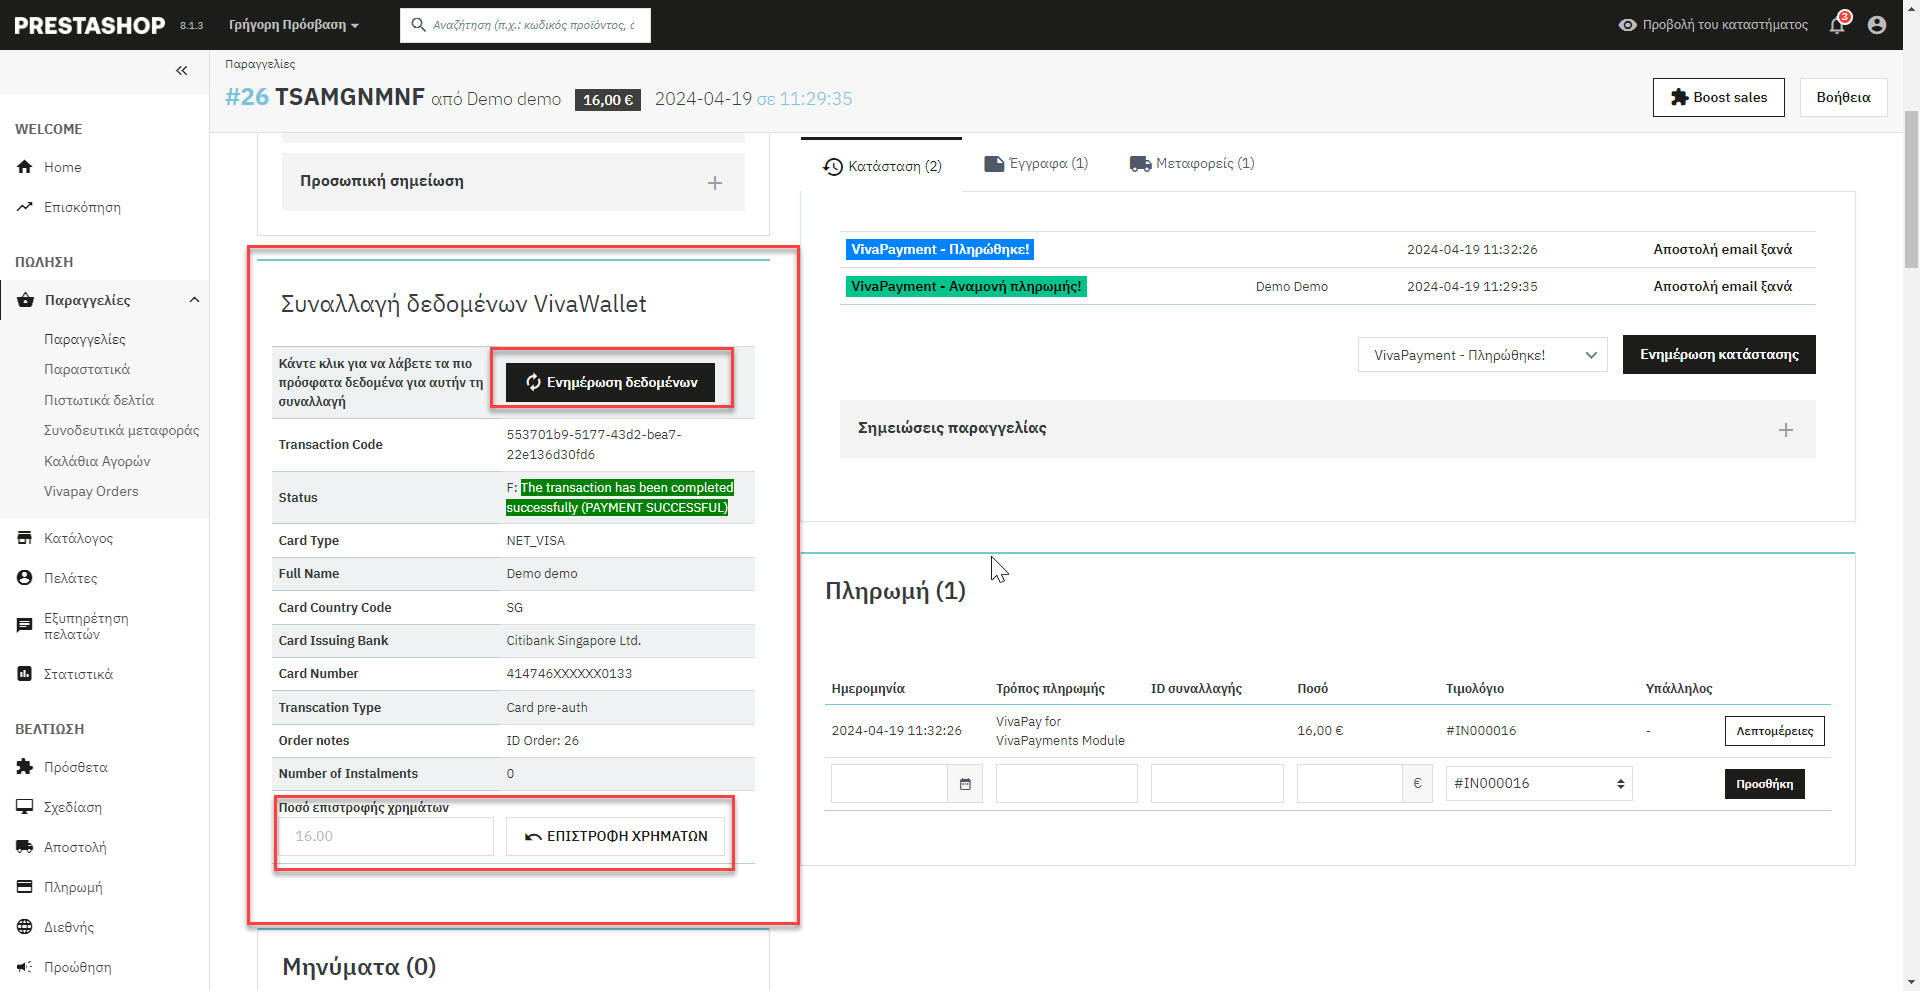
The table in this screenshot has information that concern the transaction from vivapayments. The first button you click it each time you want to get the latest status of this transaction. For example if you refund this transaction from the vivapayments admin page you can click it to get informed that this transaction is refunded.
The other button at the end refunds the ammount of the transaction. The ammount is fixed and indicated at the box.
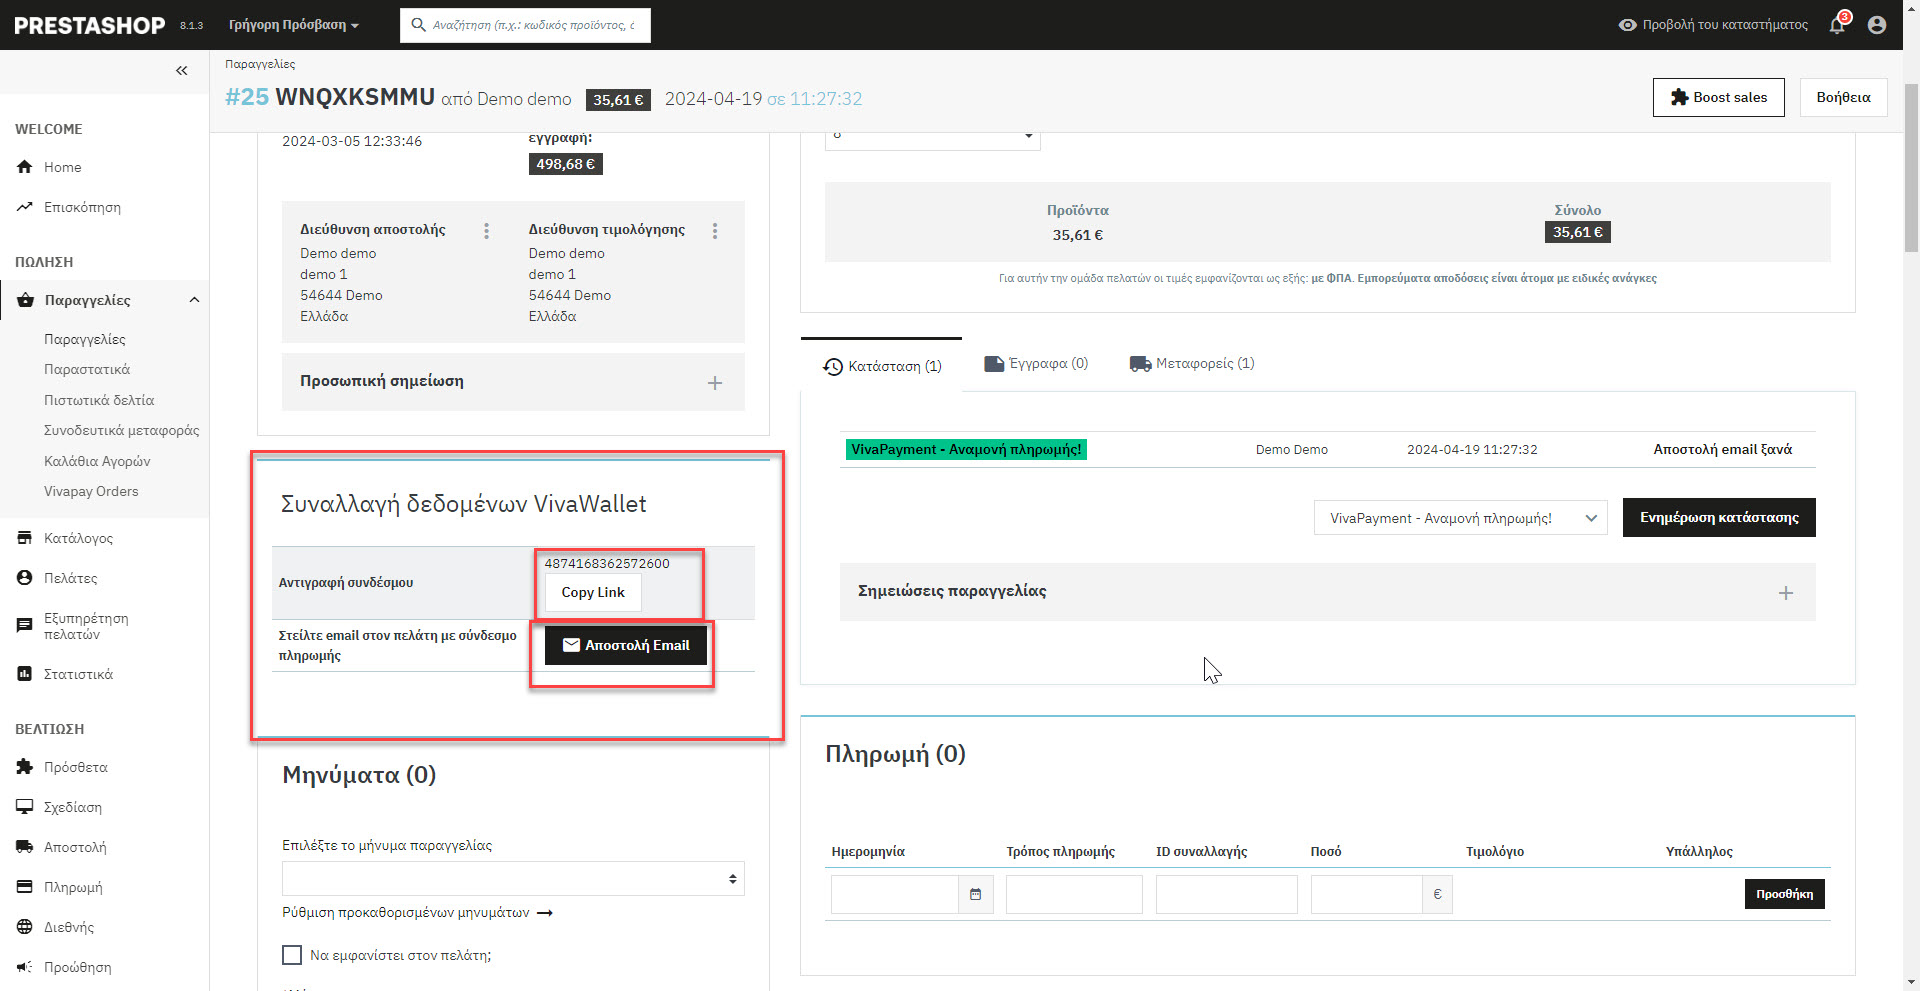
This order is created but not paid, thus the information displaed here is for you if you want to share them to your customer to finish the payment.
You can also find the send email button on orders that you created via the admin.
For e.g. I create an order for a customer of mine that phoned me from the admin area of my prestashop. After I create the order by choosing vivapay as payment option and status unpaid, I can click send email in this order and a link will be send to my customer to be able to pay his/her order.
Email Files you might want to change
There is a email template file that you might want to change to your standards.
- root folder/modules/vivapay/mails/{language}/vivapayment_notification.html
Variables to use in this email
{payment_link} for the payment link
{firstname} and {lastname} of the customer
{order_code} for the order code of the payment(you propably do not need it but we entered it)
Module Translation
To translate our module is easy. Navigate yourself from the back office (admin area) menu International -> Translations on the Modify Translations section choose.
Type of translation -> Installed modules translations
Select your module -> Vivapay
Select your language -> The language you wish to translate it to.
And click modify.
Now translate each field and click save or save and stay button.
Contribute
Please feel free to contribute to our module and help PrestaShops all around the globe. You can contribute to our module by translating it and sending us the translated file of your native language via a support ticket! Translated files are stored at root folder/modules/vivapay/translations/ folder. And if you are too kind you can also contribute by translating this documentation in your language!
Finally contribute by letting us know the flaws of our module, or the suggestions you have so we can make it better!
Please feel free to open a ticket for a difficulty you have or for a contribution in addons.prestashop.com (do not forget to login with the account you purchase the module first)
Happy sales! <3